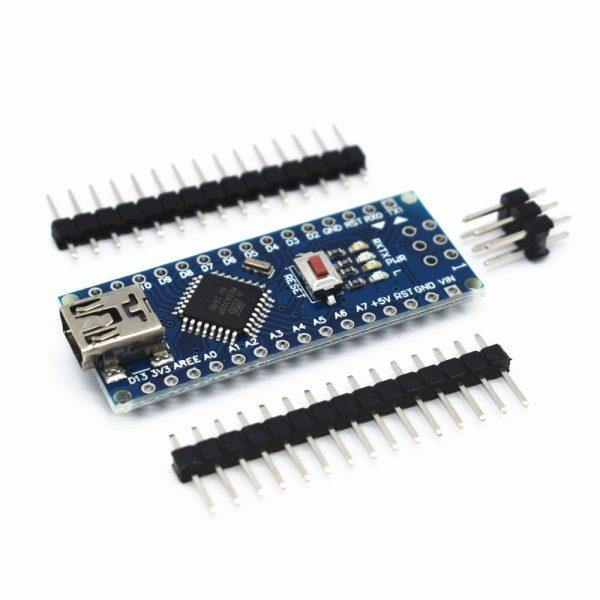
The Arduino Nano is a small breadboard-friendly board whose design is based on the ATmega328P released in 2008. It offers the same connectivity and specs as the Arduino Uno board in a smaller form factor.
The Arduino Nano has 30 male I/O headers, in a DIP-30-like configuration, which can be programmed using the Arduino Software IDE, which is common to all Arduino boards and runs both online and offline. The board can be powered by a type-B mini-USB cable or a 9 V battery.

read more : What is Arduino UNO
Arduino Nano Features
- Microcontroller: Microchip ATmega328P
- Operating voltage: 5 V
- Input voltage: 5 to 20 V
- Digital I/O pins: 14 ( with 6 optional PWM outputs)
- Analog input pins: 8
- DC per I/O pin: 40 mA
- EEPROM: 1 KB
- DC for 3.3 V pin: 50 mA
- Flash memory: 32 KB, of which the bootloader uses 2 KB
- SRAM: 2 KB
- Mass: 7 g
- Clock speed: 16 MHz
- Length: 45 mm
- Width: 18 mm
- DC Power Jack: No
- USB: Mini-USB Type-B
- ICSP Header: Yes
read more : Arduino Pin Configuration
Arduino Nano Pinout
The pinout of the Arduino nano is as follows
|
1 |
A0 - A7 |
Analog Input / Output Pins. |
|
2 |
D0 - D13 |
Digital Input / Output Pins. |
|
|
|
|
|
3 |
Pin # 3, 5, 6, 9, 10, 11 |
Pulse Width Modulation ( PWM ) Pins. |
|
4 |
Pin # A4, A5 |
I2C Communication Pins. |
|
5 |
Pin # 0 (RX) , Pin # 1 (TX) |
Serial Communication Pins. |
|
6 |
Pin # 13 |
Built-In LED for Testing. |
|
7 |
Pin # 10, 11, 12, 13 |
SPI Communication Pins. |
|
8 |
D2 & D3 |
External Interrupt Pins. |

Difference between Arduino UNO and Arduino Nano
|
Arduino Nano |
Arduino Uno |
|
An integrated development environment is used in Nano to make it work with the users. |
As there is no user interface, fewer interfaces are used. The architecture is light. |
|
Nano is used by fabricators who start fabrication of the system with a smaller size of breadboard to learn and analyze the working of Arduino. |
Arduino Uno is the popular Arduino due to its smaller size and compatibility with software and hardware in the system. |
|
There is no power regulator in the controller and if external power is needed, a 5V-regulated power source has to be used in the system while using Nano. |
Uno has a power regulator on the board to control the power coming to the controller. |
|
The size is small and smaller than all other Arduino breadboards which helps it to restrict itself to any space-centered applications or projects in the system. |
Its size is quite big when compared with Nano but is used mostly due to its working in the system and the features used. If the application is not space centered, it is better to go with Uno. |
|
The microcontroller used is AT Mega 328 and AT Mega 168 and it depends on the usage of the project and the programmer using it. |
The microcontroller is always AT Mega 328 in Uno. |
|
Ethernet shields are not used here and this is better for small programs with automation that can be done easily. |
If the applications are simple with sensors, GPS, motor controls, or alarms, it is better to go with an Uno microcontroller. |
|
The programmable microcontroller is not used but a USB UART interface is available in Nano to manage the tasks. The UART interface is FT232RL. |
A programmable microcontroller is used so that the tasks could be modified easily in the system with ATMega 16U2. |
|
40 micro Ampere power is given per I/O in Nano and the power is not great to deliver big projects. |
20 micro Ampere power is given per I/O in Uno and hence the power delivery is less. |
|
Nano does not have Arduino shields but a pin header is set up in the breadboard so that prototypes can be made easier with the help of sockets available. |
Uno can connect to Arduino shields and has a pin header arrangement to make it compatible with any other breadboards in the system. |
|
Permanent storage memory is 0.51kB EEPROM with working storage and memory storage being added to the system. |
Permanent storage memory is 1kB EEPROM and there is other working storage and flash memory storage. |
read more : Arduino Sensor types and Applications
Applications of an Arduino Nano
Arduino Nano projects can be built by reading inputs of a sensor, a button, or a finger and giving an output by turning the motor or LED ON, etc. Some of the domains it can be used are as follows:
- Samples of electronic systems & products
- Automation
- Several DIY projects
- Control Systems
- Embedded Systems
- Robotics
- Instrumentation
read more : Interfacing Proximity Sensors with Arduino
Conclusion
Arduino Nano is a compact yet powerful microcontroller board packed with features. Its small size, versatility, and extensive community support make it an excellent choice for both beginners and advanced users. Whether you're a hobbyist or a professional, the Arduino Nano opens up a world of possibilities for your creative projects. Start exploring today and unleash your imagination with the Arduino Nano!
If you appreciate our work don't forget to share this post and leave your opinion in the comment box.
Please do check out other blog posts about Popular electronics
Make sure you check out our wide range of products and collections (we offer some exciting deals!)