Introduction
Welcome to the world of DIY crafting and home repairs, where the humble glue gun reigns supreme. We are going to explore the importance of understanding proper glue gun usage and how it contributes to safety and efficiency in your projects.
Understanding the Importance of Proper Glue Gun Usage
A glue gun may seem like a simple tool, but its improper use can lead to disastrous consequences. Whether you're a seasoned crafter or a novice DIY enthusiast, knowing how to wield this device with precision and care is paramount.
Proper glue gun usage ensures not only the success of your projects but also your safety. From preventing burns to ensuring strong bonds, mastering the art of glue gun application is essential for a seamless crafting experience.

Ensuring Safety and Efficiency in DIY Projects
Safety should always be the top priority when working with any tool, and the glue gun is no exception. In this section, we'll explore how adhering to safety protocols enhances not only your well-being but also the efficiency of your DIY endeavors.
Before diving into your project, take the time to familiarize yourself with the safety features of your glue gun. From heat-resistant gloves to proper ventilation, implementing safety measures can prevent accidents and injuries.
Efficiency is key to a successful DIY project. By mastering the proper techniques for using a glue gun, you can streamline your workflow and achieve professional results in less time. From preparing your workspace to choosing the right glue sticks, every step plays a crucial role in enhancing efficiency.
Now, we'll explore each aspect of glue gun usage in detail, equipping you with the knowledge and skills needed to tackle any crafting or repair project with confidence. So, let's dive in and unlock the full potential of this versatile tool.
Getting Started with Your Glue Gun
Now, we'll embark on the journey of acquainting ourselves with the glue gun, an indispensable tool for crafters and DIY enthusiasts alike. From preparing your workspace to understanding the nuances of different glue gun types, let's dive into the essential steps for getting started with your glue gun.

Preparing Your Workspace
Before delving into your project, it's crucial to set up a conducive workspace that promotes efficiency and safety. Here's how to prepare your workspace effectively:
- Clear the Area: Start by clearing your work surface of any clutter or obstacles. This ensures ample space for maneuvering and minimizes the risk of accidents.
- Protective Covering: Lay down a protective covering such as a silicone mat or aluminum foil to safeguard your workspace from glue drips and spills. This makes cleanup easier and protects your surfaces from damage.
- Ventilation: Ensure adequate ventilation in your workspace to dissipate fumes emitted by the glue gun. This promotes a healthier working environment and reduces the risk of inhaling harmful vapors.
Familiarizing Yourself with the Tool and Materials
A thorough understanding of your glue gun and the accompanying materials is essential for achieving optimal results. Here's how to familiarize yourself with the tool and materials:
- Read the Manual: Take the time to read the instruction manual provided with your glue gun. Familiarize yourself with its features, functions, and safety precautions to ensure safe and effective usage.
- Inspect the Glue Gun: Before use, inspect your glue gun for any damage or defects. Check the nozzle, trigger mechanism, and cord for signs of wear or malfunction. It's essential to address any issues before proceeding with your project.
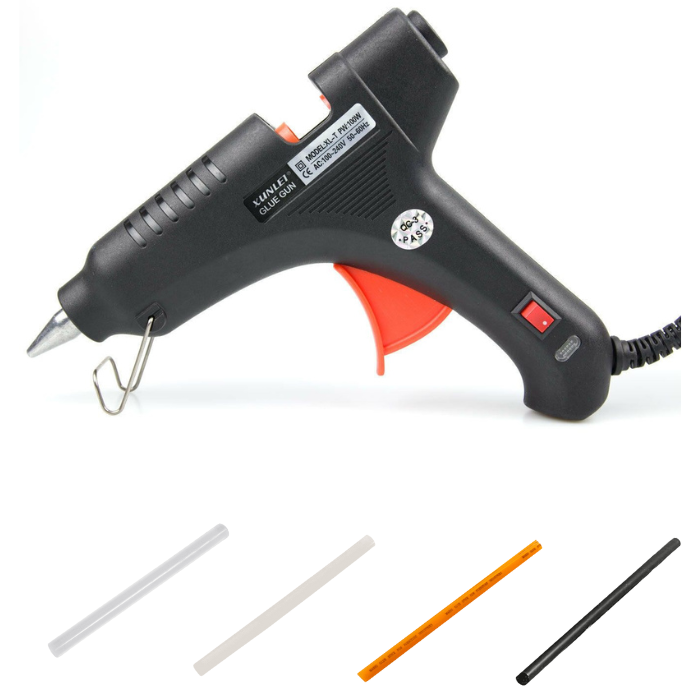
- Select the Right Glue Sticks: Choose glue sticks that are compatible with your glue gun model. Consider factors such as size, temperature, and adhesive properties to ensure optimal performance and bonding strength.
Understanding Different Types of Glue Guns
Glue guns come in various types, each catering to specific needs and preferences. Understanding the differences between these types allows you to make an informed decision when selecting a glue gun for your projects. Here's an overview of the most common types of glue guns:
- Low-Temperature Glue Guns: Ideal for delicate materials such as foam, fabric, and lace, low-temperature glue guns operate at a lower heat setting to prevent damage.

- High-Temperature Glue Guns: Designed for more robust materials such as wood, metal, and plastic, high-temperature glue guns deliver stronger bonds and greater versatility. However, caution must be exercised to avoid burns and damage to sensitive materials.

- Dual-Temperature Glue Guns: Offering the best of both worlds, dual-temperature glue guns allow users to switch between low and high heat settings depending on the application. This versatility makes them suitable for a wide range of projects and materials.

By familiarizing yourself with these different types of glue guns, you can choose the one that best suits your needs and preferences, setting the stage for successful crafting and DIY endeavors.
Preparing Your Glue Gun for Use
Now, we'll delve into the essential steps for preparing your glue gun for optimal performance. From cleaning the nozzle to loading the glue gun correctly and safely warming it up, proper preparation sets the foundation for successful crafting and DIY projects.
Cleaning the Nozzle
The cleanliness of your glue gun's nozzle directly impacts the quality of adhesive application. Follow these steps to ensure a clean and unclogged nozzle:

- Inspect the Nozzle: Before cleaning, inspect the nozzle for any residual glue or debris. Use a flashlight if necessary to illuminate hard-to-reach areas.
- Use a Cleaning Tool: Utilize a specialized cleaning tool, such as a needle or pin, to remove any buildup from the nozzle. Gently insert the tool into the nozzle and carefully dislodge any accumulated residue.
- Apply Cleaning Solution: For stubborn residue, apply a small amount of acetone or specialized glue gun cleaner to a cotton swab or cloth. Use the soaked swab or cloth to wipe away the residue, ensuring thorough cleaning.
- Repeat as Necessary: Continue cleaning the nozzle until all traces of glue residue are removed. Take care not to damage the nozzle during the cleaning process, as this can affect the performance of the glue gun.
Loading the Glue Gun Correctly
Properly loading your glue gun with adhesive sticks ensures consistent and reliable application. Follow these steps to load your glue gun correctly:
- Select the Right Glue Sticks: Choose glue sticks that match the specifications of your glue gun. Ensure that the diameter and length of the sticks are compatible with your device to prevent jamming or malfunction.
- Insert the Glue Stick: Insert the glue stick into the designated chamber of the glue gun, ensuring that it sits securely in place. Push the stick gently until it makes contact with the heating element.
- Allow for Preheating: Before initiating adhesive application, allow the glue gun sufficient time to preheat. Most glue guns require several minutes to reach the optimal temperature for adhesive melting.
- Test for Readiness: To confirm that the glue gun is adequately heated, dispense a small amount of adhesive onto a scrap material. The glue should flow smoothly and evenly, indicating that the gun is ready for use.
Warming Up the Glue Gun Safely
Safely warming up your glue gun is essential for preventing accidents and ensuring optimal performance. Follow these safety guidelines when warming up your glue gun:
- Use a Stable Surface: Place the glue gun on a stable and heat-resistant surface, such as a silicone mat or metal tray. Avoid placing the gun on flammable materials or uneven surfaces that may cause it to tip over.
- Monitor the Temperature: Keep a close eye on the temperature indicator of your glue gun during the warming-up process. Avoid overheating the gun, as this can lead to excessive glue flow and potential burns.
- Handle with Care: Exercise caution when handling the glue gun, especially when the heating element is active. Use heat-resistant gloves to protect your hands from burns and avoid touching the nozzle directly.
By following these steps for preparing your glue gun for use, you'll ensure optimal performance and safety throughout your crafting and DIY endeavors. Now that your glue gun is primed and ready, it's time to unleash your creativity and tackle your next project with confidence.
Using Your Glue Gun Effectively
Now, we'll delve into the art of using your glue gun effectively to achieve professional results in your crafting and DIY projects. From applying glue to mastering precision and ensuring optimal adhesion, these techniques will elevate your craftsmanship to the next level.
Applying Glue to Projects
Mastering the technique of applying glue is essential for achieving clean and seamless bonds in your projects. Follow these steps for precise glue application:

- Positioning the Gun: Hold the glue gun at a comfortable angle, ensuring that the nozzle is in direct contact with the surface to be bonded.
- Applying Pressure: Gently squeeze the trigger to dispense the desired amount of glue onto the surface. Apply consistent pressure to ensure even distribution of the adhesive.
- Moving Swiftly: Work swiftly to apply the glue before it cools and hardens. Avoid pausing mid-application, as this can result in uneven bonding and unsightly glue strings.
- Avoiding Excess Glue: Use the minimum amount of glue necessary to achieve a strong bond. Excess glue can lead to messy-looking projects and prolonged drying times.
Tips for Precision and Control
Precision and control are key to achieving professional-looking results with your glue gun. Incorporate these tips into your crafting process to enhance precision and control:
- Practice Makes Perfect: Take the time to practice applying glue on scrap materials before tackling your main project. This allows you to familiarize yourself with the flow and behavior of the adhesive.
- Use Supportive Tools: Utilize auxiliary tools such as tweezers or toothpicks to manipulate the glue and achieve precise placement. These tools offer greater control and help prevent accidental smudges or spills.
- Work in Sections: Break down larger projects into smaller, manageable sections to maintain control over the glue application process. This allows you to focus on one area at a time, ensuring precision and consistency throughout the project.
- Stay Patient: Patience is key when working with a glue gun. Avoid rushing through the application process, as haste can lead to mistakes and sloppy craftsmanship. Take your time and work methodically to achieve the best results.
Ensuring Adhesion and Bond Strength
Ensuring optimal adhesion is crucial for the longevity and durability of your projects. Follow these guidelines to achieve strong and reliable bonds:
- Proper Surface Preparation: Ensure that the surfaces to be bonded are clean, dry, and free of dust or debris. Proper surface preparation promotes maximum adhesion and minimizes the risk of bond failure.
- Apply Even Pressure: After applying the glue, firmly press the bonded surfaces together to ensure uniform contact and distribution of the adhesive. Apply even pressure across the entire bond area for optimal strength.
- Allow for Proper Curing: Allow the adhesive to cure fully according to the manufacturer's recommendations before subjecting the bonded surfaces to stress or load. Rushing the curing process can compromise bond strength and durability.
By mastering the techniques, you'll be well-equipped to use your glue gun effectively and achieve professional-quality results in your crafting and DIY endeavors. With precision, control, and attention to detail, you can unleash your creativity and bring your projects to life.
Safety Measures and Cleanup
Safety should always be a top priority when using a glue gun, as these devices operate at high temperatures and can cause burns or other injuries if not handled properly. We'll discuss essential safety measures to follow during and after glue gun use, as well as tips for cleaning up spills and residue to maintain a tidy workspace.
Cooling Down and Storing Your Glue Gun
After completing your project, it's crucial to allow your glue gun to cool down properly before storing it. Follow these steps to ensure safe cooling and storage:
- Unplug the Glue Gun: Once you've finished using the glue gun, unplug it from the power source to prevent accidental activation and reduce the risk of burns.
- Allow Time for Cooling: Give the glue gun sufficient time to cool down completely before handling or storing it. The cooling process may take several minutes, depending on the model and temperature settings.
- Use a Heat-Resistant Stand: Place the glue gun on a heat-resistant stand or surface to prevent damage to surrounding objects and minimize the risk of burns. Avoid placing the gun on flammable materials or surfaces that may be damaged by heat.
- Store in a Safe Location: Once cooled, store the glue gun in a secure location away from children and pets. Choose a spot where it won't accidentally fall or be knocked over, reducing the risk of damage or injury.
Safe Handling Practices
Adhering to safe handling practices is essential for preventing accidents and injuries while using a glue gun. Follow these guidelines to ensure safe handling:
- Wear Protective Gear: When operating a glue gun, wear heat-resistant gloves to protect your hands from burns and use safety goggles to shield your eyes from hot glue splatters.
- Avoid Contact with Hot Surfaces: Exercise caution to avoid touching the hot nozzle or other heated parts of the glue gun during use. Handle the device by its insulated handle and avoid placing it directly on surfaces that may be damaged by heat.
- Keep Away from Flammable Materials: Be mindful of your surroundings and avoid using a glue gun near flammable materials, such as paper, fabric, or chemicals, which could ignite and cause a fire hazard.
Cleaning Up Spills and Residue
Spills and residue are inevitable when using a glue gun, but proper cleanup can help maintain a tidy workspace and prevent accidents. Follow these steps to clean up spills and residue effectively:
- Wait for Cool Down: Allow any spilled glue or residue to cool and harden completely before attempting to clean it up. Attempting to clean hot glue can result in burns or further spreading of the adhesive.
- Use Scraping Tools: Once cooled, use a scraping tool, such as a putty knife or plastic scraper, to gently remove hardened glue from surfaces. Take care not to scratch or damage the underlying material.
- Use Solvents for Stubborn Residue: For stubborn residue that cannot be removed with scraping alone, apply a small amount of solvent, such as isopropyl alcohol or acetone, to a clean cloth and gently rub the affected area until the residue dissolves.
By following these safety measures and cleanup techniques, you can ensure a safe and productive experience when using your glue gun for crafting and DIY projects. Remember to prioritize safety at all times and take care to maintain a clean and organized workspace for optimal results.
Conclusion
Using a glue gun can be a rewarding experience, allowing you to tackle a variety of crafting and repair projects with ease. By following the guidelines outlined in this guide, you can use your glue gun safely and effectively, achieving professional-quality results every time.
Remember to prioritize safety at all times, both for yourself and those around you. With proper preparation, effective application techniques, and careful cleanup, you can unleash your creativity and tackle DIY projects with confidence. Thank you for joining us on this journey to master the art of using a glue gun. We hope you found this guide informative and helpful in your crafting and DIY endeavors. Happy crafting!