Introduction
In the dynamic realm of DIY electrical projects, the humble jumper wire emerges as a silent hero, facilitating seamless connections and unlocking the potential for innovation. This introduction aims to shed light on the pivotal role these unassuming components play in the world of electronics.
In the intricate landscape of circuitry, jumper wires act as miniature conductive bridges, allowing for the swift transmission of signals and power. Their significance lies in their ability to link various components, making them indispensable in the creation and modification of electrical setups.
Jumper wires serve as the architects of circuit modifications, providing a straightforward means to connect, disconnect, and redirect electrical pathways. This versatility simplifies the prototyping process, enabling enthusiasts to iterate and refine their designs with ease.
For electronics enthusiasts embarking on DIY projects, a fundamental understanding of jumper wires becomes paramount. This knowledge empowers individuals to navigate the intricacies of circuitry, troubleshoot issues effectively, and unleash their creativity with confidence.
By delving into the nuanced world of jumper wires, this article aims to equip readers with the insights needed to harness the full potential of these unassuming yet indispensable components. As we explore their definitions, functionalities, and practical applications, a deeper appreciation for the role of jumper wires in electronics will undoubtedly emerge.

What Are Jumper Wires?
Jumper wires, the unsung heroes of electronic assemblies, are miniature conductive connectors designed for circuit configuration. These slender, unassuming components play a pivotal role in establishing seamless connections within electronic setups.
- Conductive Marvels: Jumper wires act as conduits for the smooth flow of electrical signals, bridging the gaps between various components on a circuit board.
- Tiny But Mighty: Despite their diminutive size, these connectors wield significant influence, enabling the creation of intricate circuit pathways.
In the realm of computer peripherals and motherboard configurations, jumper wires take center stage, offering unparalleled functionality for customization and optimization.
- Motherboard Settings: Jumper wires serve as customizable tools to configure motherboard settings. They enable users to fine-tune parameters, optimizing the performance of computer peripherals.
- Intrusion Detection: Imagine a motherboard supporting intrusion detection. Jumper wires come into play, allowing users to set or disable this feature seamlessly.
Beyond theory, jumper wires find real-world applications in configuring settings, making them indispensable for DIY enthusiasts and electronic hobbyists.
- Swiftness in Configurations: Jumper wires facilitate rapid changes to circuit configurations, a boon for those engaged in prototyping and experimentation.
- Diagnostic Capabilities: When troubleshooting, these wires become diagnostic tools, helping identify faulty components or areas within a circuit.
Jumper wires go beyond being mere connectors; they are dynamic instruments for shaping the functionality of electronic systems. This has laid the groundwork for understanding the essence of these tiny, yet powerful, contributors to the world of electronics.
Understanding Jumper Wire Colours
In the intricate world of electronics, the hues of jumper wires transcend mere aesthetics, holding crucial information for those fluent in the language of circuits.
- Colour Coding Logic: Different colours signify distinct roles in a circuit. Decoding this logic enhances efficiency and precision in connecting components.
- Standard Conventions: Understanding industry-standard colour conventions is key. For instance, red might denote power, black for ground, and additional colours for specific functionalities.
The Role of Colour in Jumper Wires:
Beyond aesthetics, the role of colour in jumper wires extends to practical functionality, enabling users to navigate the intricate web of interconnected components.
- Visual Clarity: Colour differentiation aids in visually distinguishing connections, reducing the likelihood of errors during circuit assembly.
- Efficient Troubleshooting: When troubleshooting, the colour-coded system allows for quick identification of specific components, streamlining the diagnostic process.
Leveraging Colour for Efficient Circuit Organization
Assembling circuits becomes an art form when leveraging the strategic use of colours. This goes beyond aesthetics, delving into the realm of systematic and efficient circuit organization.
- Logical Arrangement: Colour-coded wires allow for a logical and organized arrangement of components on a breadboard or circuit board.
- Enhanced Design Aesthetics: Beyond functionality, colour coordination contributes to the overall visual appeal of the electronic project, showcasing a meticulous approach to design.
Understanding the intricate language of jumper wire colours is akin to mastering a coding language in the world of electronics. This unravels the significance of colours, transforming them from mere visual elements to indispensable cues for efficient circuitry.
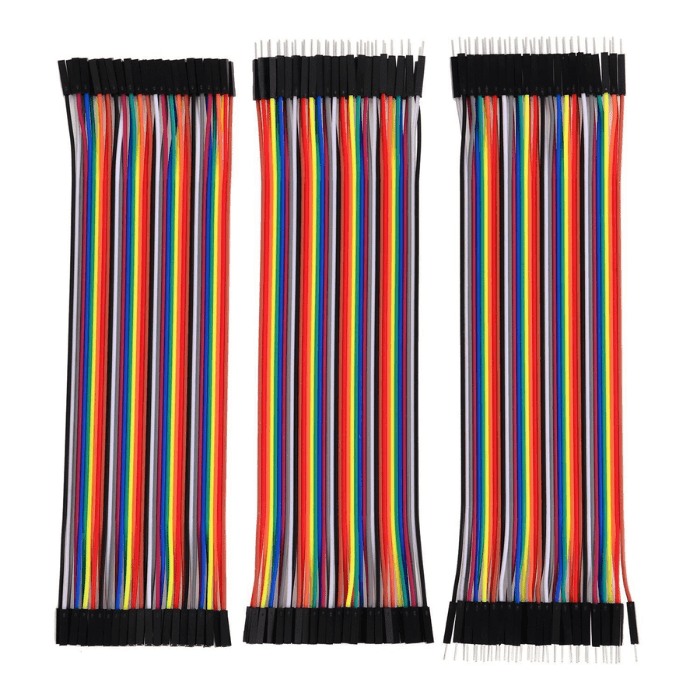
Types of Jumper Wires
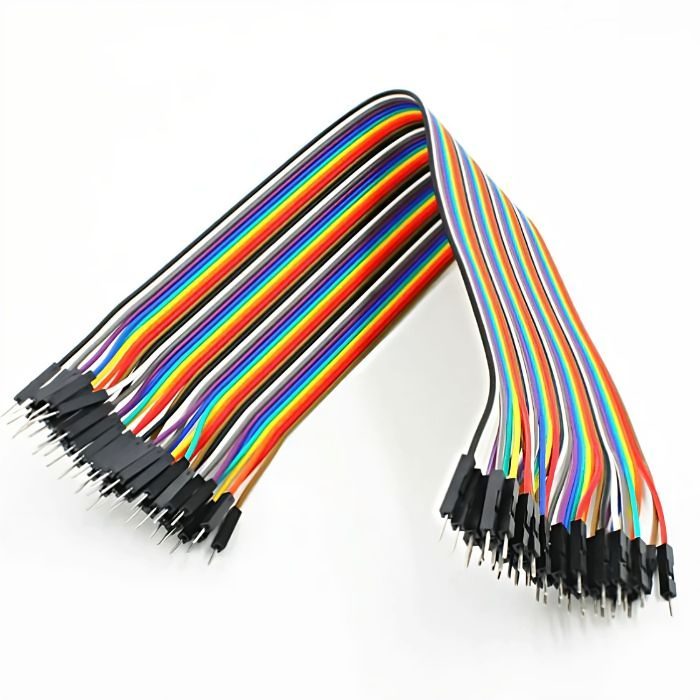
In the intricate world of electronics, male-to-male jumper wires stand as the workhorse of connectivity, offering a versatile solution for a myriad of applications.
- Common Connector Standard: The male-to-male configuration ensures compatibility across various electronic components, providing a standardized connection approach.

- Versatility in Prototyping: Ideal for breadboarding and prototyping, these jumper wires effortlessly link components, facilitating the swift construction and modification of circuits.
Dive into the diverse realm of jumper wires with the exploration of male-to-female and female-to-female configurations, each catering to specific connection needs.
- Male-to-Female Dynamics: This setup enables the connection of male pins to female receptacles, offering flexibility in interfacing with a range of components.

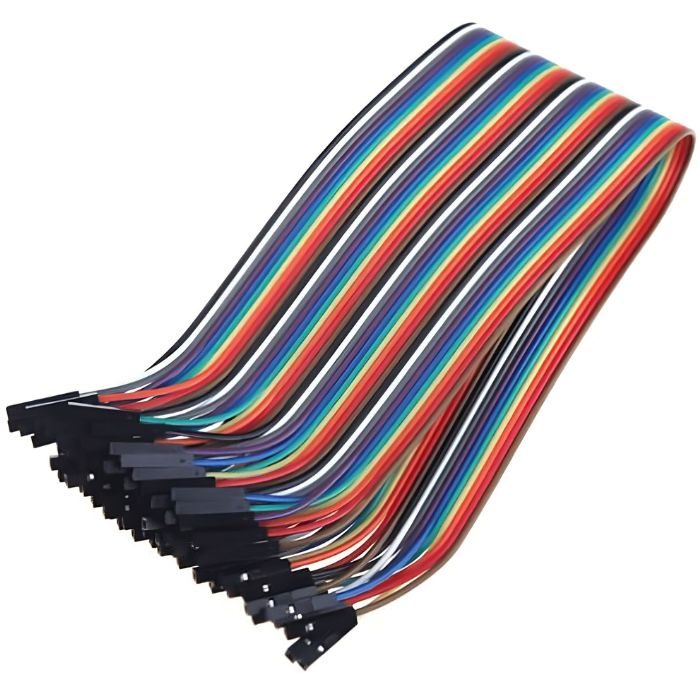
- Female-to-Female Flexibility: These wires provide a unique solution for connecting components with female connectors, broadening the compatibility spectrum in circuit design.

Head shapes play a pivotal role in the functionality and applicability of jumper wires. Delve into the nuances of square and round heads to make informed choices.
- Square Head Precision: Square-headed jumper wires offer precise connections, ensuring a secure fit in components with corresponding square receptacles.
- Round Head Adaptability: The rounded head configuration provides adaptability, seamlessly fitting into various components with circular connectors, adding a layer of versatility to your toolkit.
Understanding the nuances of these jumper wire types opens doors to limitless possibilities in electronic prototyping and circuit design, ensuring you have the right connection for every scenario.
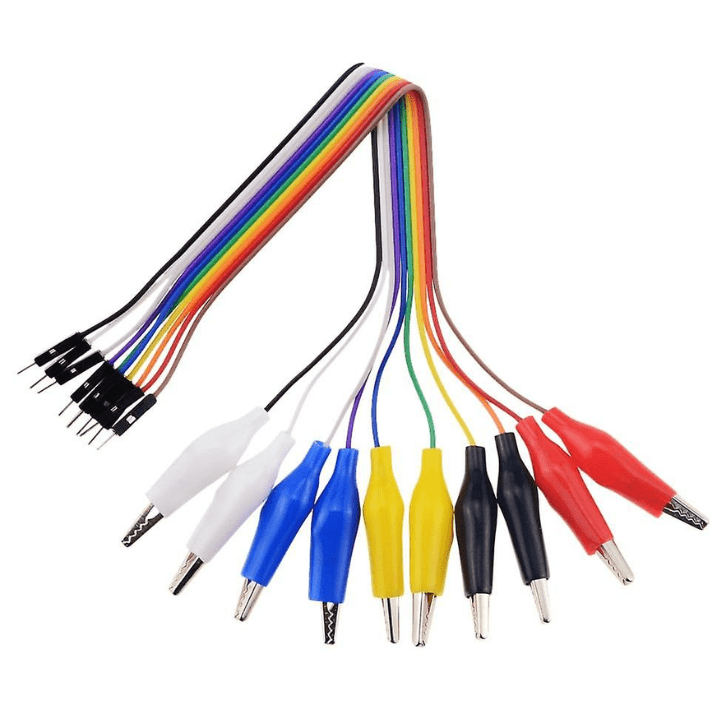
Beyond Basic Jumpers: Alligator Clips
In the realm of electronic connectivity, the transition from standard jumpers to alligator clips introduces a new dimension of versatility, catering to specialized applications.
- Enhanced Grip and Stability: Alligator clips excel in situations where a secure grip is paramount. Their serrated jaws ensure a stable connection to components, preventing accidental disconnections.
- Specialized Testing: Utilize alligator clips for targeted testing and measurements. Their ability to firmly latch onto components makes them invaluable for diagnostic procedures and precise assessments.

Practical Applications
Embark on a journey into the practical realm of alligator clips, where their unique attributes shine in connecting ports on the LilyPad Arduino Board.
- Streamlined Prototyping: Alligator clips streamline the prototyping process, allowing for quick and secure connections between LilyPad components. This facilitates efficient experimentation and iteration in wearable electronics projects.
- Minimized Interference: When navigating the intricacies of LilyPad circuits, alligator clips minimize interference and ensure a clean, interference-free connection, enhancing the reliability of your electronic wearables.
Combine the finesse of male-pin jumper wires with the robust functionality of alligator clips for a hybrid solution that adapts to various connection scenarios.
- Male Pins for Precision: Male pins offer precision in connecting to specific ports and pins on electronic components, ensuring accurate signal transmission.
- Alligator Clips for Stability: By incorporating alligator clips, you introduce a layer of stability, especially in scenarios where a firm and secure attachment is essential.
This hybrid approach bridges the gap between precision and stability in your electronic projects. Uncover the realm of possibilities beyond basic jumpers as you integrate alligator clips into your toolkit, opening avenues for specialized uses and innovative connections in your electronic endeavors.
How to Choose and Use Jumper Wires
Selecting the Right Jumper Wire
Navigating the vast array of jumper wire options requires a discerning eye. Tailoring your choice to the specific requirements of your electronics project ensures optimal performance and reliability.
- Consider Conductivity Requirements: Evaluate the conductivity demands of your circuit. For high-frequency applications, stranded wires offer flexibility and reduced signal loss, while solid-core wires provide enhanced conductivity for power connections.
- Gauge Matters: The gauge of the jumper wire affects its current-carrying capacity. Choose a thicker gauge for power-intensive components, ensuring that the wire can handle the load without overheating.
Tips for Choosing Head Types
The selection of jumper wire head types is crucial for establishing secure and efficient connections. Tailor your choice based on the specific demands of your circuitry.
- Precision with Male Pins: When precision and accurate signal transmission are paramount, opt for jumper wires with male pins. They snugly fit into female headers, ensuring a reliable and stable connection.
- Versatility of Alligator Clips: Alligator clips shine in scenarios requiring a robust and temporary connection. Ideal for experimentation and testing, these clips provide a secure grip, especially in situations where precision isn't the primary concern.
Step-by-Step Guide: Using Jumper Wires
Mastering the art of jumper wire utilization involves more than mere selection; it's about employing them effectively in circuit modification and diagnosis.
- Identify Connection Points: Clearly identify the components and connection points in your circuit. This step is essential for accurate modifications and diagnoses.
- Use Color-Coding: Leverage the color-coding of jumper wires to organize and streamline your connections. Assign specific colors to different signal types or functions, enhancing clarity.
- Secure Connections: Ensure a secure and stable connection by firmly attaching the jumper wires to their designated points. Loose connections can lead to unreliable circuit behavior.
- Isolate and Test: Isolate sections of your circuit using jumper wires to pinpoint issues. Test each segment independently to identify faulty components or connections.

By understanding the nuances of jumper wire selection and employing them strategically in your circuits, you pave the way for efficient modifications and precise diagnostics in your electronics projects.
Jumper Wires and Soldering
Soldering Jumper Wires:
Soldering jumper wires can elevate your electronic projects, providing a secure and lasting connection. However, feasibility depends on various factors. Here's a comprehensive guide:
- Wire Type Matters: Opt for wires with a solid core for soldering, as they offer stability and are less prone to bending during the soldering process.
- Evaluate Circuit Flexibility: Consider the necessity of future modifications. Soldering may limit flexibility, making it challenging to adjust or replace components compared to using non-permanent connections.
Ensuring Visibility:
Achieving a successful solder joint goes beyond the act of soldering itself; it involves ensuring visibility and integrity. Follow these guidelines for optimal results:
- Cleanliness is Key: Ensure both the wire and the component are clean before soldering. Residue or contaminants can hinder the solder from adhering properly.
- Adequate Lighting: Work in well-lit conditions to clearly see the soldering area. Adequate lighting reduces the chances of errors and ensures precision in your soldering.
Insulation Considerations:
Preventing short circuits is paramount when soldering jumper wires. Consider the following insulation tips to safeguard your circuits:
- Heat Shrink Tubing: After soldering, apply heat shrink tubing over the soldered joint. Heat it carefully to provide insulation and mechanical protection, reducing the risk of shorts.
- Use Insulating Tape: For a quick solution, insulating tape can be applied over the soldered area. Ensure it's tightly wrapped and covers the joint adequately.
By understanding the feasibility of soldering, ensuring visibility during the process, and implementing effective insulation measures, you can seamlessly incorporate soldered jumper wires into your electronic projects while minimizing the risk of short circuits.
Conclusion
Jumper wires, often overlooked heroes in electronics, play a fundamental role in enabling seamless connections within circuits. As conductive bridges, they facilitate the flow of signals, empowering the intricate dance of electrons. In retrospect, understanding the significance of jumper wires unveils their indispensable nature in DIY electrical projects. From simplifying circuit modifications to configuring settings in computer peripherals, these tiny metal connectors form the backbone of countless electronic endeavors. Their versatility extends beyond the boundaries of conventional wiring, making them a linchpin in the realm of electronics.
For DIY enthusiasts, mastering the art of jumper wire applications opens doors to a world of creative possibilities. These enthusiasts, armed with the knowledge of jumper wire basics, gain the ability to mold and modify circuits with precision. It's the mastery of this seemingly simple component that empowers individuals to transform electronic concepts into tangible prototypes. Aspiring electronics hobbyists can leverage the unique functionalities of male-to-male, male-to-female, and female-to-female jumper wires, understanding their differences and applications. The journey from novice to adept DIYer involves exploring head shapes, such as square vs. round endpoints, and choosing the right jumper wire for specific tasks.
Jumper wires transcend their utilitarian nature, encouraging creativity in electronics projects. Alligator clips and specialized connectors add finesse to the toolkit, enabling enthusiasts to connect ports on devices like the LilyPad Arduino Board with ease. The closing chapter serves as an invitation to delve into the limitless possibilities that jumper wires offer. As you embark on your electronic ventures, remember that these unassuming wires are the conduits of innovation, connecting ideas and components to bring your creations to life. May your circuits be robust, your connections secure, and your creativity boundless.