Introduction
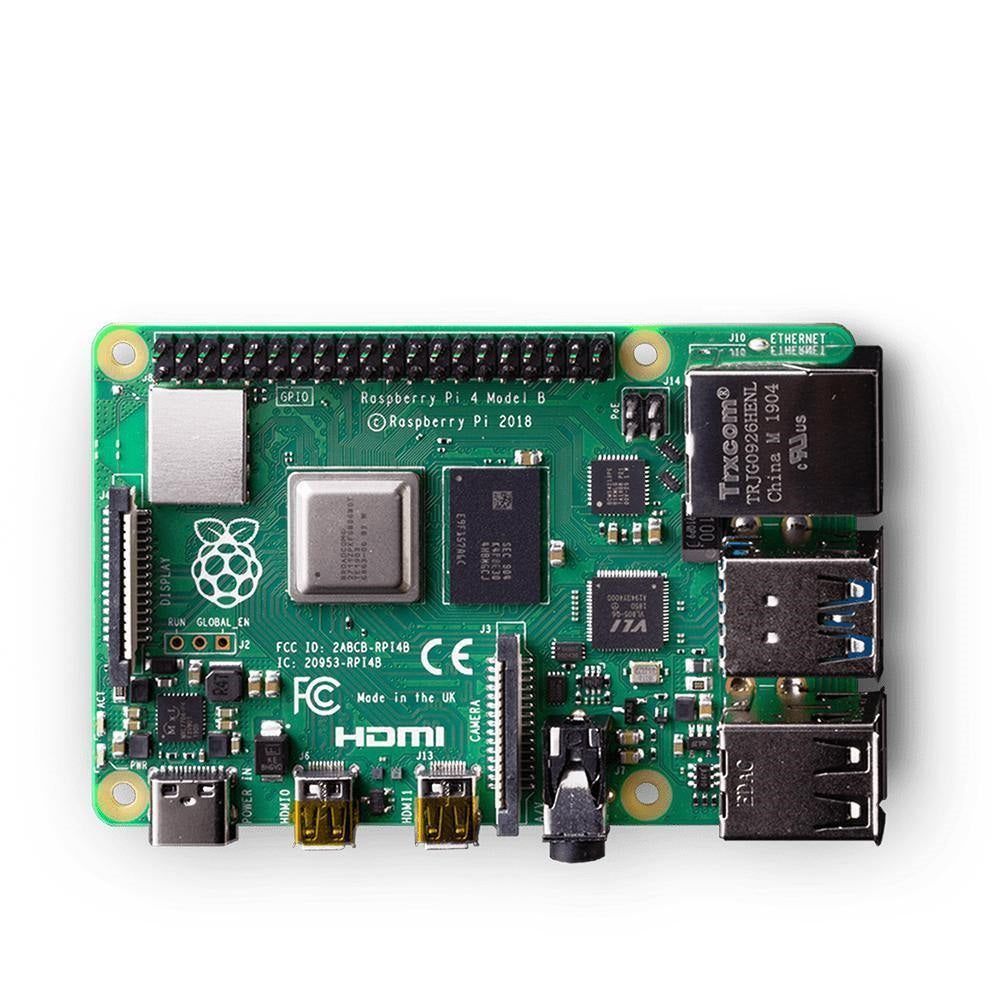
The release of the Raspberry Pi 5 in 2023 signifies a major leap forward for the popular line of single-board computers. Building upon the success of the Raspberry Pi 4, the Pi 5 iterations showcase remarkable improvements that make it more powerful while retaining the tinkering spirit and beginner-friendliness that Raspberry Pis are known for.
The most noticeable upgrade is the shift to dual USB 3.2 sockets that boost I/O speed. This, coupled with an upgraded processor, enables the Pi 5 to achieve a 50-60% increase in performance over its predecessor. The improved hardware unlocks new possibilities, allowing the Raspberry Pi 5 to take on more intensive computing tasks.
Another key upgrade is the addition of an external PCIe port, a first for the Raspberry Pi range. This port permits connecting fast NVMe SSD storage. Previously, Raspberry Pi boards were limited to SD card or USB drive storage. The PCIe interface can achieve SSD speeds of up to 2.1 GB/s for vastly improved read/write times compared to SD cards. This advancement expands the use cases for Pi 5 for applications requiring fast disk operations.
With its newest iteration, the Raspberry Pi retains its core competency - providing an affordable and accessible way for programming enthusiasts to build creative projects. The Pi 5 makes this even easier. Its upgraded hardware grants the power for buttery-smooth 4K video playback, faster file transfers, and snappier performance even when multitasking. Yet it remains extremely beginner-friendly, with an unchanged form factor, extensive community resources, and Raspberry Pi OS support.
For experienced makers, the Pi 5's improved specifications open the gateway to use cases like AI applications, 3D graphics rendering, and desktop PC replacements, which were previously unrealistic on Raspberry Pi boards. The PCIe port addition also paves the way for connecting peripherals like graphics cards and disk arrays. The Raspberry Pi 5 truly brings the power of a basic desktop computer to a compact single-board footprint.

Turning Raspberry Pi 5 into a Retro Console
Introduction to Retro Gaming on Raspberry Pi 5
Gaming on the Raspberry Pi has come a long way. With its upgraded processor and focus on improved throughput, the Raspberry Pi 5 is perfect for building DIY retro gaming consoles. Its boosted performance means emulating old-school games feels fast and smooth, which is vital for enjoyable gameplay.

The Pi 5 is also the most beginner-friendly option yet for retro gaming. Its plug-and-play nature means setup is straightforward even for novices. Ready-to-go retro gaming operating systems like RetroPie streamline installation. Combined with the Pi 5's HDMI 2.1 port that supports 4K at 60fps, users can recreate the nostalgia of classic gaming in stunning detail.
Setting Up Retro Gaming Software
For software, RetroPie and Recalbox are two popular choices tailored for retro gaming on Raspberry Pi. RetroPie builds on top of the Linux distribution EmulationStation, providing a polished interface and including various emulators like SNES, N64, and PlayStation. Recalbox takes a more streamlined approach, focusing solely on games and hiding unnecessary settings.
Here is an overview for setting up a Raspberry Pi 5 retro gaming console using RetroPie:
- Flash the RetroPie image onto a microSD card. This can be done using balenaEtcher or Raspberry Pi Imager.
- Insert the microSD into the Pi 5 then connect it to a display via HDMI and attach a USB controller.
- After bootup completes, launch the RetroPie setup script which installs applications like game emulator packages.
- Navigate to the WiFi setup section to get the Pi 5 connected to the internet for downloading game art assets and ROMs.
- Transfer your game ROMs over to the system via USB drive or network share. Popular places to find legal ROMs include online stores like GOG.
- Scrape game metadata using the built-in scraping tool to automatically add box art and descriptions for each game.
- Customize themes and splash screens using the RetroPie UI options for a personalized look and feel.
With these steps completed, your Raspberry Pi 5 transforms into a polished retro gaming console able to play classics from a wide range of vintage systems!
Expanding Gaming Options
A major perk of building your own retro gaming rig is enjoying an extensive library spanning many consoles and genres. The Raspberry Pi 5's upgraded hardware can smoothly emulate 16-bit and even 32-bit systems. Popular options include:
- Super Nintendo Entertainment System (SNES) for iconic Nintendo classics like Super Mario World.
- Sega Genesis for Sonic the Hedgehog and Mortal Kombat arcade-quality ports.
- Sony PlayStation for landmark 3D games like Resident Evil and Final Fantasy VII.
- Nintendo 64 for bringing Mario into the third dimension in Super Mario 64.
- Arcade machines for playing thousands of coin-op classics using MAME.
Collecting physical cartridges can get expensive. With emulation, the full history of video games is accessible in a single DIY box smaller than a lunchbox!
Hosting a Media Server with Raspberry Pi 5
Transforming Raspberry Pi 5 into a Media Server
A media server allows centralizing your personal media collection for consumption across devices like phones, tablets, and smart TVs. With faster wired and wireless networking, the Raspberry Pi 5 is a compact and energy-efficient way to create your own private media server.

The Kodi media center paired with the LibreELEC Linux distribution is the go-to combo for achieving this on a Raspberry Pi. LibreELEC provides a barebones Linux OS that boots directly into the Kodi interface. This delivers a polished media playback hub focused solely around your own media library.
Hosting your own media server is ideal for households with many devices. It avoids the need to manually transfer media files or juggle multiple subscriptions. And it gives full control over your library without relying on cloud services.
Streaming and Storing Media
Kodi pulls media from local network shares, so the first step is centralizing your media collection on a NAS (network-attached storage) device or shared folder on a desktop PC. Kodi can directly play most common media formats like MKV movies, MP3 music, and JPEG images.
Once set up, the Kodi interface is accessible on any device on your local network. The UPnP media server functionality in Kodi even allows seamless streaming to smart TVs and media boxes like the Amazon Fire Stick.
With onboard SATA ports and fast USB 3.2, the Pi 5 itself can also double as the media storage hub. Large USB hard drives provide an inexpensive storage solution. For a major speed boost, connecting an M.2 NVMe SSD over the PCIe port enables lightning-fast 4K video playback from the SSD directly attached to the Pi 5 board.
Using Raspberry Pi 5 as a Cheap Desktop PC
Raspberry Pi 5 as a Desktop PC Alternative
Previously, Raspberry Pi boards were too underpowered to serve as full desktop computer replacements. But the upgraded internals of the Pi 5 combined with the revolutionary addition of a PCIe port make it a viable low-cost alternative to traditional desktops for basic tasks.

The Pi 5's 1.8 GHz quad-core ARM processor delivers enough performance for web browsing, document editing, and media playback. Connecting to a 4K monitor via the Pi 5's dual-monitor-capable HDMI 2.1 port provides an immersive big-screen desktop experience. The PCIe interface can then accommodate an NVMe SSD for super-responsive load times when launching programs and opening files.
Operating System Options
Leveraging the Raspberry Pi 5 as a desktop computer grants flexibility in choosing an operating system. Raspberry Pi OS delivers a familiar Debian-derived Linux desktop environment. For a more Windows-like feel, third party Ubuntu builds bring the Cinnamon or XFCE desktop to the Pi 5.
Raspberry Pi OS has the advantage of vendor-supplied updates and documentation tailored for the Pi hardware. But for tinkerers, alternate Linux distributions like Manjaro ARM or Ubuntu MATE enable configuring a customized desktop OS with the latest kernel and packages.
Android is even a possibility on the Pi 5 for a mobile-inspired workflow. While less common than Linux, ported builds like LineageOS provide an Android desktop experience. The full range of Linux and Android options caters the Pi 5 to many user preferences.
Turning Raspberry Pi 5 into a Security Camera
DIY Home Security with Raspberry Pi 5
Constructing your own home security camera using the Raspberry Pi 5 puts the power of smart camera functionality into your own hands. The open-source nature means full customization of both hardware and software to suit security needs.

The Pi 5's quad-core processor suits the potentially heavy computational demands of computer vision. And the onboard wireless networking removes the need for messy Ethernet cabling. Perks like these make the Pi 5 an ideal starting point for a homemade security rig.
Setting Up Security Software
The go-to OS turning the Pi 5 into a capable security camera is MotionEyeOS. This Linux distribution is purpose-built for surveillance applications. It boots directly into the MotionEye web admin panel used to configure streaming options and motion detection zones.
For managing the feed remotely, a VPN (virtual private network) securely connects the Pi 5 so it can be accessed from anywhere. Using a service like Tailscale or ZeroTier creates an encrypted tunnel without needing to open router ports or deal with dynamic IPs.
Putting extra effort into the physical camera housing by adding hardware like infrared night vision and weatherproofing can take the project to the next level for robust outdoor security monitoring.
Using Pi 5 for Network Storage
Raspberry Pi 5 as a Network-Addressable Storage (NAS) Solution
Network-attached storage devices provide shared storage that can be accessed by all devices on a local network. With SATA ports and USB 3.2 allowing fast external drive connectivity, the Raspberry Pi 5 is ideal for constructing a DIY NAS.
The Pi 5 NAS approach delivers key advantages over off-the-shelf consumer NAS units. It offers greater customization and lower cost. Energy efficiency is another major upside, with the Pi 5 sipping only 5W under load. Always-on operation costs pennies per month.
Setting Up Raspberry Pi 5 as NAS
The Linux-based OpenMediaVault is the premier open-source NAS OS for the Raspberry Pi. It delivers user-friendly Samba share creation and FTP server capabilities out of the box. SMB shares provide easy network drive mapping on Windows PCs.
After installing OpenMediaVault, connecting an external SSD or hard drive to the USB 3.2 or SATA ports enables sharing the storage over the network. Port forwarding opens up the shares for remote access over the internet when away from home.
Potential hurdles to be aware of include finding a compatible USB drive and properly configuring shares for remote access through a router firewall. But the learning experience of building a NAS far outweighs these challenges for tech DIY enthusiasts.
Conclusion
The Raspberry Pi 5 provides a nearly blank canvas for innovation and experimentation. As detailed in this article, the Pi 5's improved performance and connectivity unlocks new possibilities spanning retro gaming rigs, multimedia servers, network-attached storage, desktop PC replacements, and home security cameras.
These projects highlight the incredible versatility of the Raspberry Pi 5. With robust community support and ample documentation, the only limit is your imagination. The Raspberry Pi foundation has once again delivered a milestone product that makes digital making more accessible. For tech hobbyists and programming learners alike, the Raspberry Pi 5 is the ultimate tinkering sandbox. I encourage you to join the active community by getting hands-on and exploring the wide range of what this tiny single-board computer can do.