
Arduino

Arduino is an open-source hardware and software company, project and user community that designs and manufactures single-board microcontrollers and microcontroller kits for building digital devices. Arduino.CC helps to empower anyone to improve their lives through accessible electronics and digital technologies. Arduino Boards are used to be a barrier between the worlds of electronics, design, and programming. Arduino has a wide variety of boards and kits that are compatible with Windows, Mac OS, and Linux operating systems, which is perfect for beginners in computing and electronics and has a simple yet powerful programming language.
Collections in this Category
-
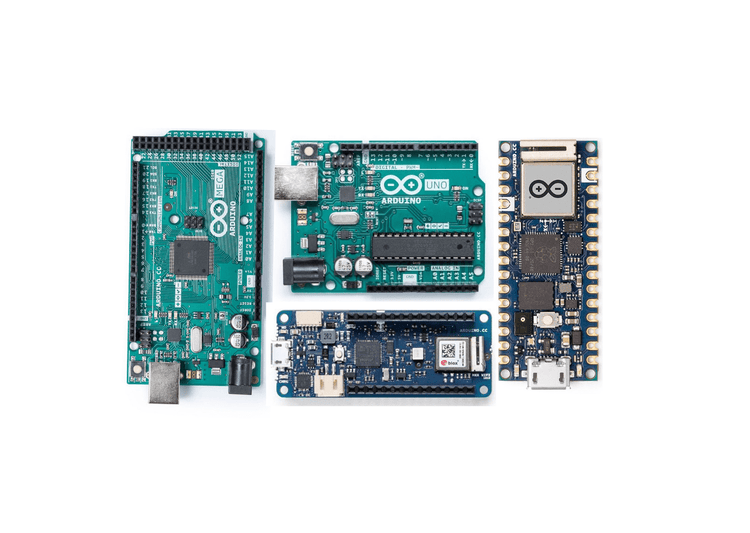
Arduino Original Boards
Original Arduino Boards The Arduino boards are microcontroller-based kits that enable users...
-
Arduino Original Kits
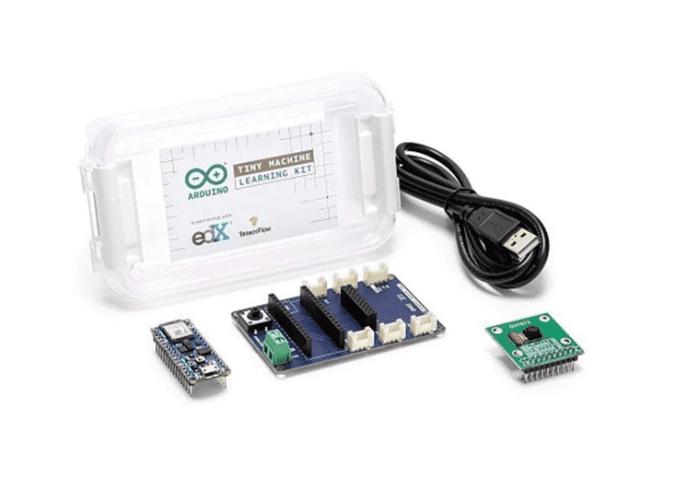
Arduino Official Kits An Arduino Original kit is a set of electronic...
-
Compatible With Arduino
Compatible With Arduino Compatible with Arduino can refer to a variety of things,...


-
-1%
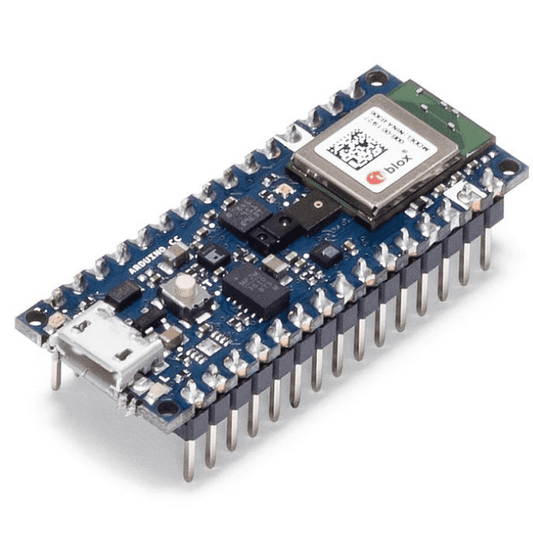
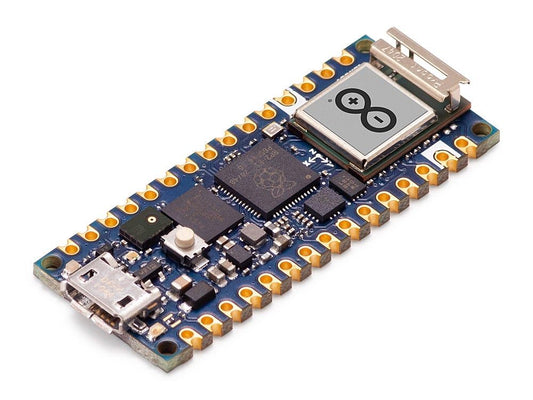
Arduino Nano BLE Sense (Rev-2) with Headers
Regular price Rs. 3,949Regular priceUnit price perRs. 3,999Sale price Rs. 3,949Incl. GST (No Hidden Charges)Sale -
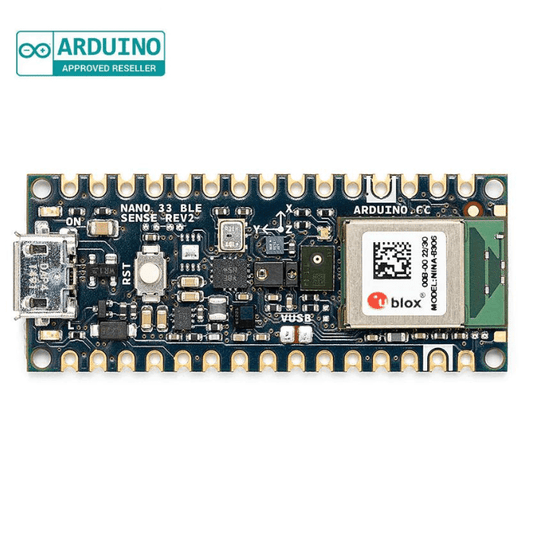
-11%

Arduino Nano 33 BLE with Headers
Regular price Rs. 3,199Regular priceUnit price perRs. 3,599Sale price Rs. 3,199Incl. GST (No Hidden Charges)Sale -
-16%
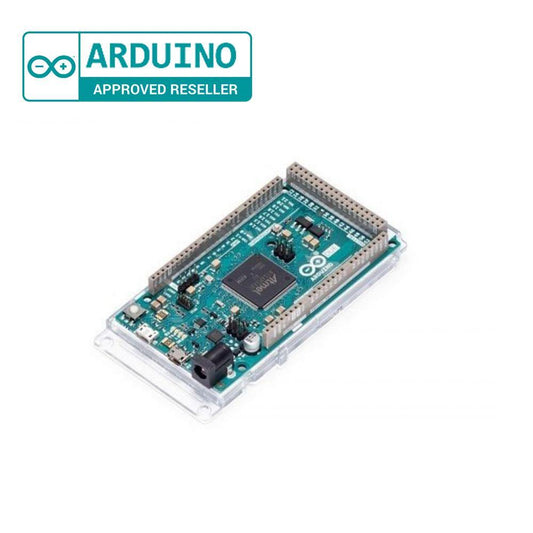
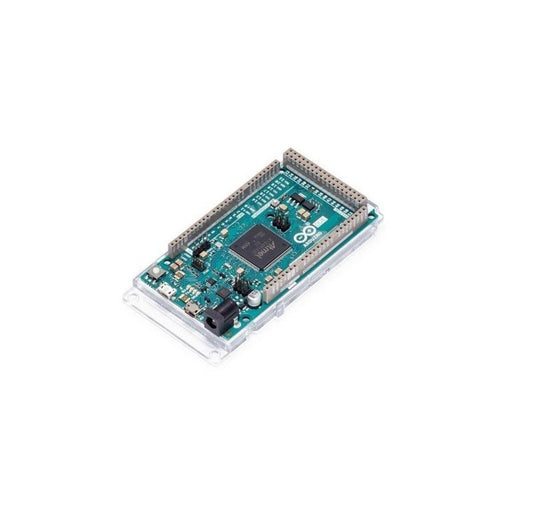
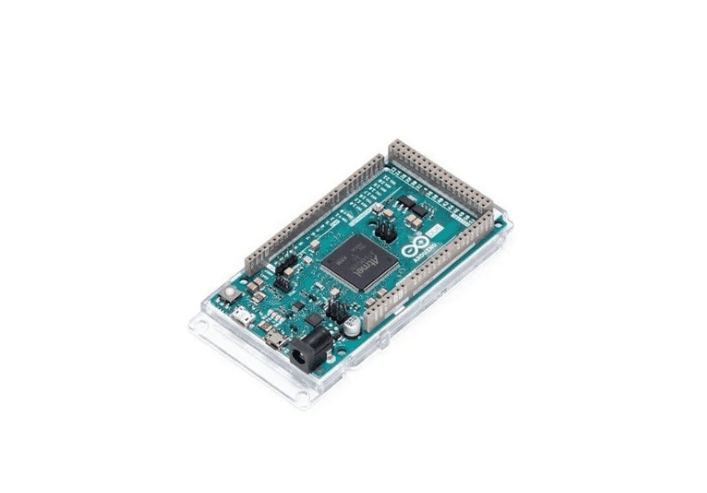
Arduino Due Original
Regular price Rs. 4,009Regular priceUnit price perRs. 4,799Sale price Rs. 4,009Incl. GST (No Hidden Charges)Sale -
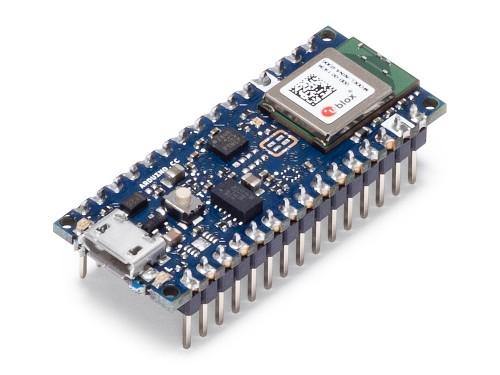
-28%
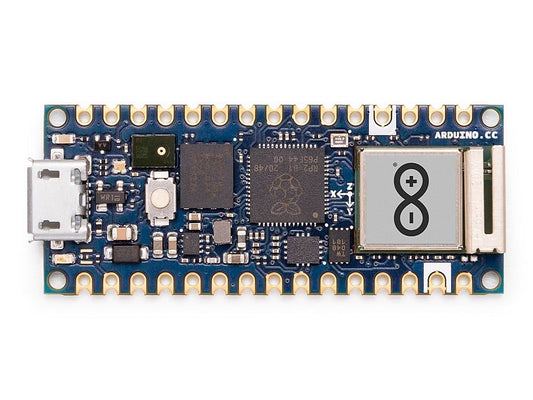
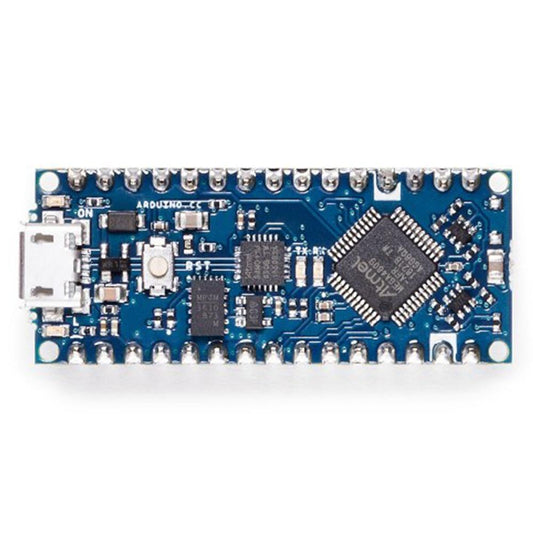
Arduino Nano RP2040 Connect without Header
Regular price Rs. 2,208Regular priceUnit price perRs. 3,053Sale price Rs. 2,208Incl. GST (No Hidden Charges)Sale -
-23%
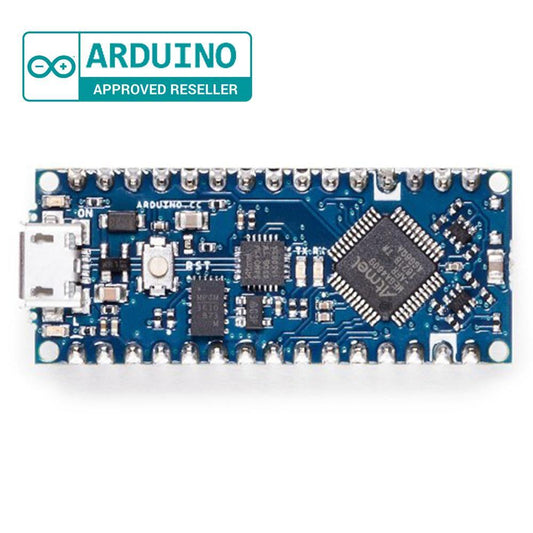
Arduino Nano Every with Headers
Regular price Rs. 1,509Regular priceUnit price perRs. 1,949Sale price Rs. 1,509Incl. GST (No Hidden Charges)Sale -
-19%
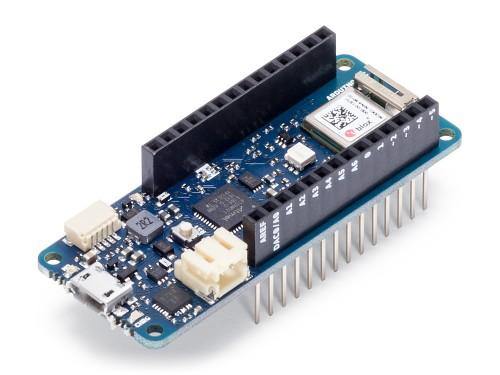
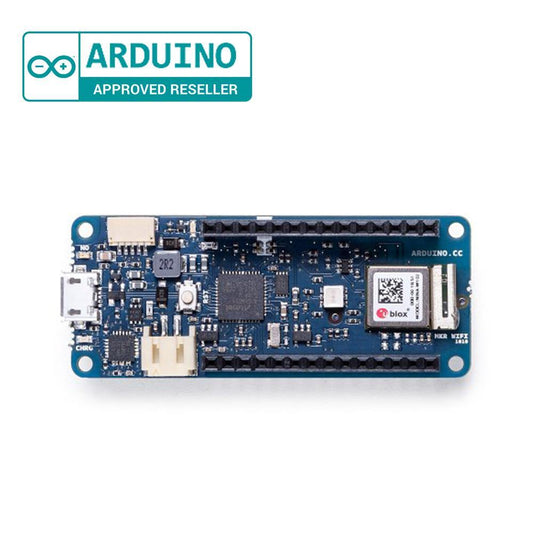
Arduino MKR WIFI 1010
Regular price Rs. 3,499Regular priceUnit price perRs. 4,299Sale price Rs. 3,499Incl. GST (No Hidden Charges)Sale -
-8%
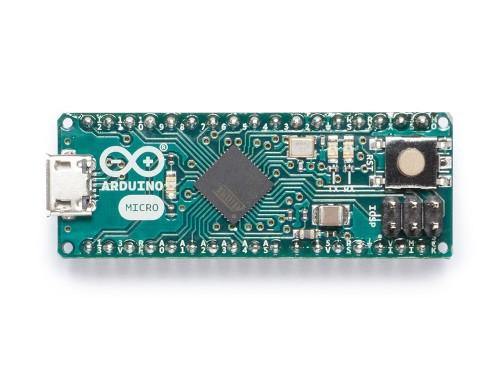
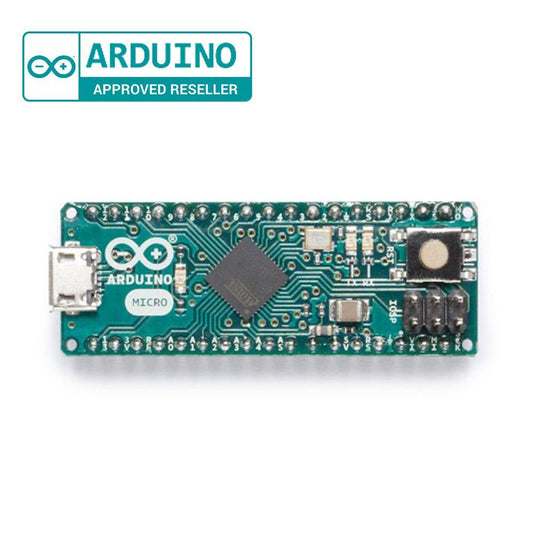
Arduino Micro
Regular price Rs. 1,779Regular priceUnit price perRs. 1,938Sale price Rs. 1,779Incl. GST (No Hidden Charges)Sale -
-18%
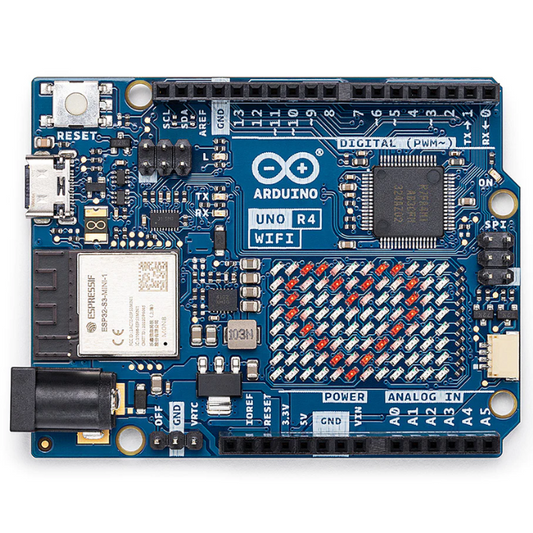
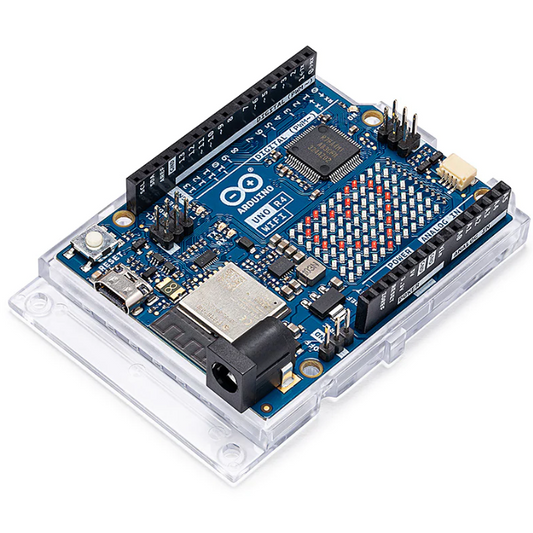
Original Arduino UNO R4 WIFI
Regular price Rs. 2,449Regular priceUnit price perRs. 2,999Sale price Rs. 2,449Incl. GST (No Hidden Charges)Sale -
-20%
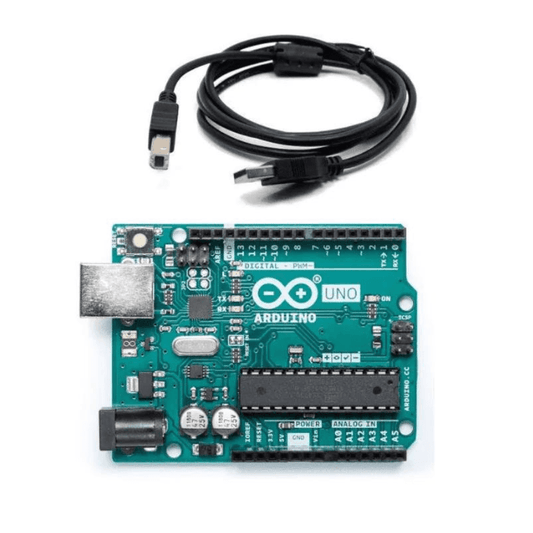
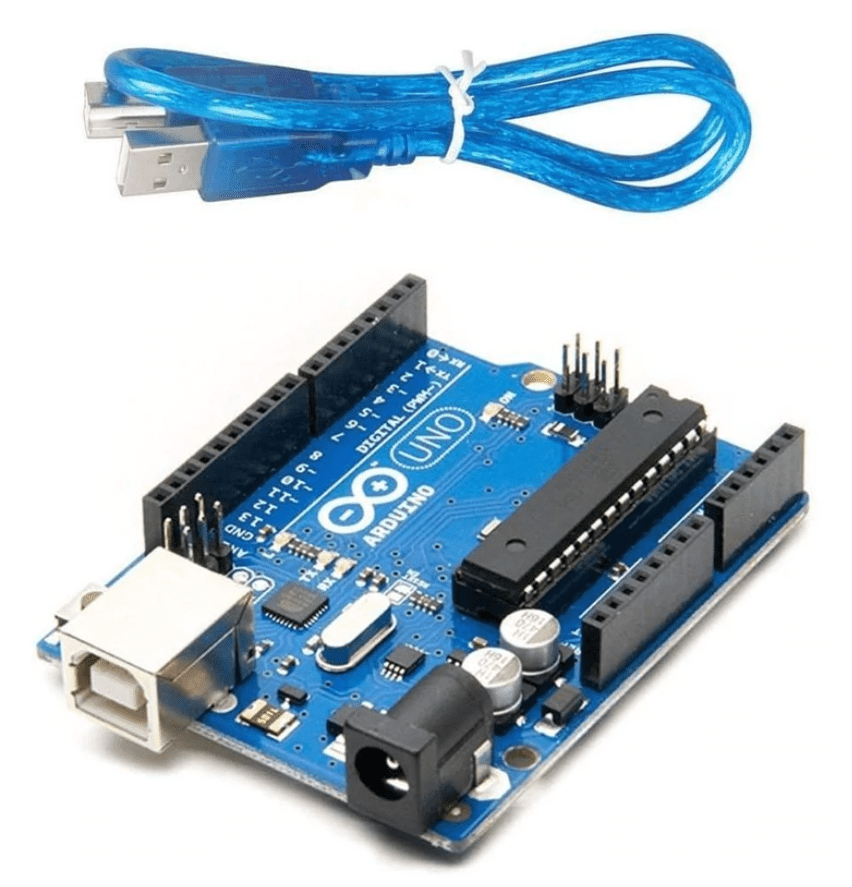
Arduino Uno R3 Original with Cable
Regular price Rs. 2,149Regular priceUnit price perRs. 2,699Sale price Rs. 2,149Incl. GST (No Hidden Charges)Sale -
-12%
Original Arduino Mega 2560 ATmega2560 Rev3
Regular price Rs. 3,329Regular priceUnit price perRs. 3,799Sale price Rs. 3,329Incl. GST (No Hidden Charges)Sold out -
-8%
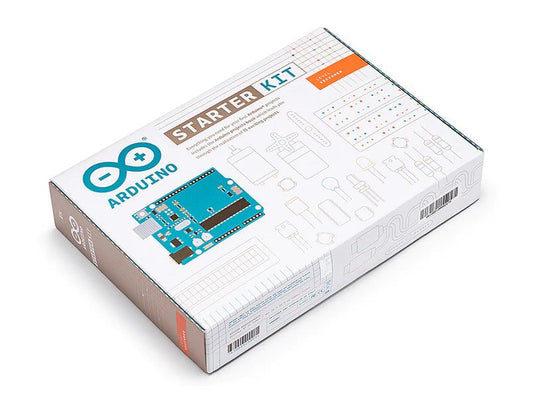
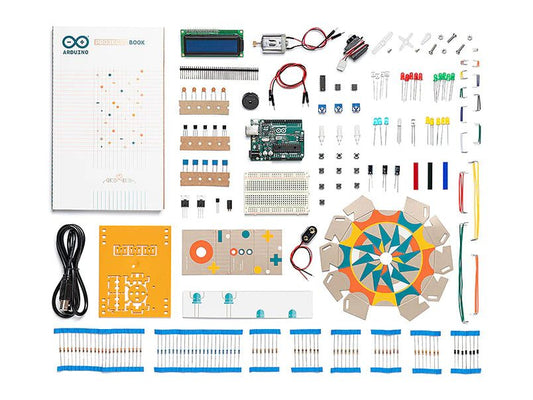
Arduino Starter Kit
Regular price Rs. 9,206Regular priceUnit price perRs. 9,999Sale price Rs. 9,206Incl. GST (No Hidden Charges)Sold out -
-11%
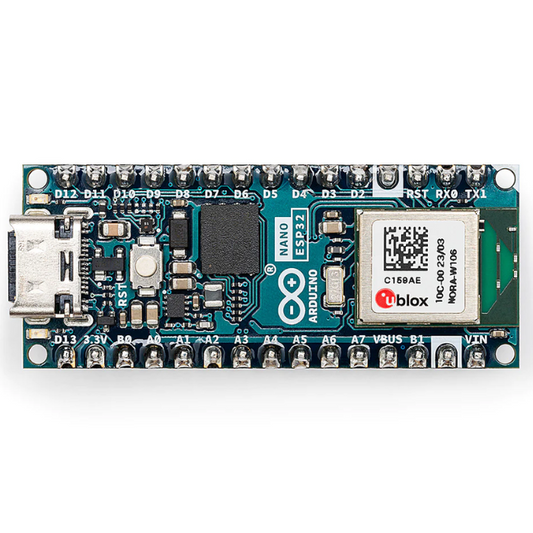
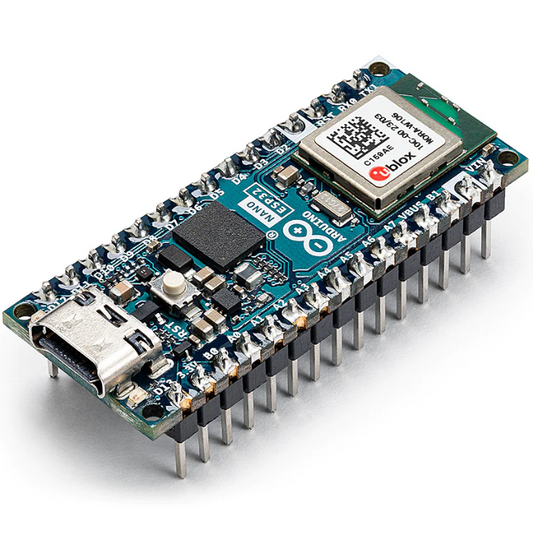
Arduino NANO ESP32 with Headers
Regular price Rs. 1,999Regular priceUnit price perRs. 2,249Sale price Rs. 1,999Incl. GST (No Hidden Charges)Sold out


Buy Arduino Online in India
Arduino is a popular open-source hardware platform that is easy to use for beginners, yet flexible enough for advanced users. It is powered by an ATMega328P microcontroller and is the most popular choice among the community because it’s cheap, easy to learn and use, and also a variety of premade modules are available for this which makes it easier for developing new projects or prototypes. There are various versions of Arduino available, each having its own advantages and use cases; whether it’s in terms of shape, size or the number of inputs and outputs. The three most commonly used Arduino versions are - Uno, Nano and Mega.
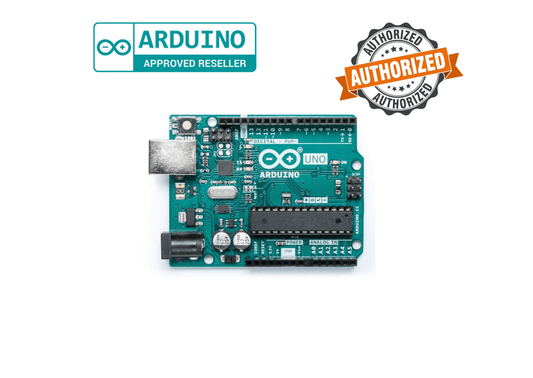
If you’re a beginner trying to get into the world of Arduino, Uno is the most ideal option to go for. Arduino is a microcontroller board based on the ATmega328P. The entry price point isn’t too high but you still get ample ports for most projects in a relatively compact package. It has 14 digital pins and 6 analog pins, giving you a total of 20 GPIO pins available for your project.
Robocraze is an Authorized Reseller of Arduino Products in India
Arduino Uno:
The Arduino Uno is an open-source microcontroller board powered by a Microchip ATmega328P. Arduino.cc created it and released it in 2010. It contains 14 digital I/O pins (six of which are PWM outputs), 6 analogue I/O pins, a 16 MHz ceramic resonator, a USB connection, a power jack, an ICSP header, and a reset button. It can be programmed using the Arduino IDE over a USB wire, or it can be powered by a battery or an AC-to-DC adaptor. It can communicate with a variety of expansion boards (shields) and other circuits for varied uses.
Arduino Nano
The Arduino Nano is a small, complete, and breadboard-friendly board, based on the ATmega328. It has the same functionality as the UNO, but with extra ports - 14 digital and 8 analog pins, as opposed to 6 analog pins in Uno. The board is about half the size of Uno and hence it’s ideal for use in applications where there is limited space.
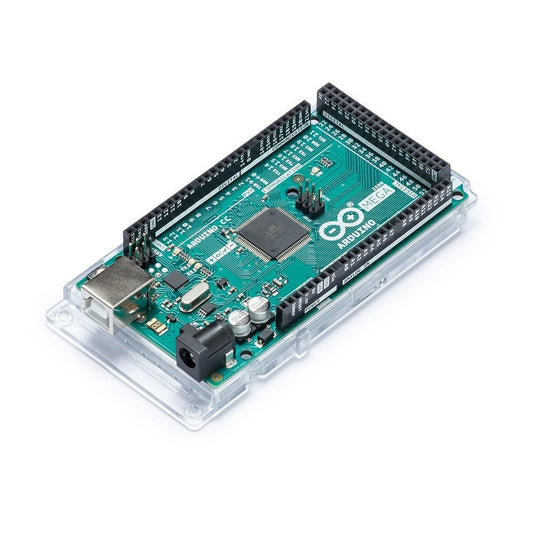
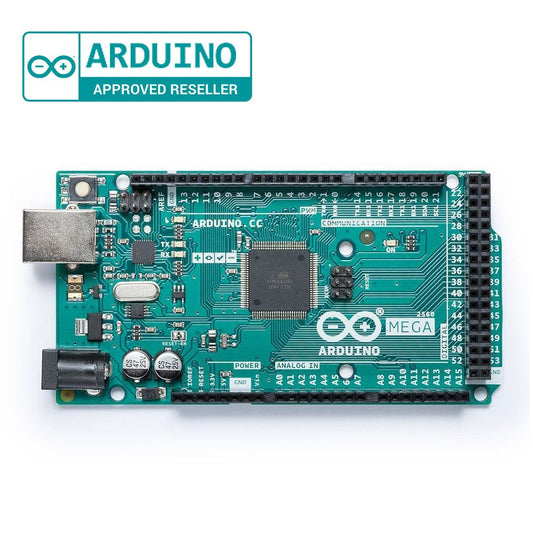
Arduino Mega
If your project requires more than 20 GPIO pins, Arduino Mega might be your best bet. Arduino Mega is a microcontroller board based on the ATmega2560. It is a bigger version of Uno, and comes with a lot of extra ports for versatility. It has 54 digital pins and 16 analog pins. With a total of 70 GPIO pins, it’s ideal for applications where you have a lot of peripherals and require extensive communications.
Robocraze is an authorised reseller of Arduino products in India, where you can get Arduino Original boards and Kits at the best pricing.
Things To Consider While Buying Arduino:
How does Arduino work?
- Arduino is an open-source electronics platform based on easy-to-use hardware and software. It is basically an AVR 8-bit microcontroller with some extra hardware, which includes - USB to serial for out-of-the-box programming, power management systems, 16 MHz external crystal to make the AVR run faster and an expanded GPIO pins to easily connect sensors, devices and peripherals. It works based on the set of instructions sent to the microcontroller.
How do I use Arduino?
- Once you have the circuit for your project ready, connect the Arduino to your computer via a USB cable. Once plugged in, the on-board LEDs on the Arduino begin to flash.
- Now your Arduino is ready to be ‘burned’. Arduino IDE is the official development environment for Arduino, and the programs are written in C++ language. Once you’re done with the code, choose the appropriate port and board on the software, and upload the program to the Arduino.
- Your Arduino must be running now. :)
Note: To help you get started, there are a number of example codes given under File -> Examples in the Arduino IDE, downloadable at the official Arduino website.
Arduino Prices in India
With Arduino, the possibilities are truly endless. For aspiring engineers looking to create innovative projects using microcontrollers and open source software, Robocraze provides an excellent option for shopping for components - buy arduino! The selection available on our website includes a variety of options that will suit any budget. Whether you’re just getting started or have plenty of experience under your belt already – we can help equip with all the tools necessary to jump start your project journey and take it to the next level. Our selection consists of both official products as well as compatible modules which offer comparable performance at lower prices without sacrificing quality whatever type you need, we got what it takes right here! To top off these amazing deals even further every product is backed by extended warranty so customers don't need worry about running into problems later down the road either-Robocraze has them covered! Shop online today and get ready build something incredible tomorrow!| Arduino Type | Tentative Price (in INR) |
| Arduino Nano | 1499/- |
| Arduino Mega | 2849/- |
| Arduino Due | 2999/- |
| Arduino Uno | 1699/- |
FAQs:
1. Why is Arduino a preferred choice, for beginners and experts alike?
- Arduino is an open-source electronics prototyping platform based on flexible hardware and software, whereby the standard schematic can be used by anyone so as to make their own version of an Arduino board. Due to this reason, Arduino has a huge community behind the project - thereby also attracting beginners into the platform, especially when it comes to support and tutorials.
2. Which is the best Arduino for your use case and why?
- Arduino Nano: Suitable for projects where there’s very limited space.
- Arduino Mega: Suitable for projects that requires a large number of GPIO connections.
- Arduino Due: Suitable for projects that require more powerful hardware for large scale Projects.
- Arduino Micro: Suitable for projects where space comes at a premium.
3. Which Arduino board is best for beginners?
- If you’re a beginner trying to get into the world of Arduino, Uno is the ideal option to go for. The entry price point isn’t too high and there are plenty of ‘Getting Started’ guides and project ideas available online. Still Confused then read our blog on Which Arduino Board to Buy
- It also comes with 14 digital pins - 6 capable of PWM output and 6 analog pins for a total of 20 GPIO Pins. It also supports I2C, SPI and UART communication - giving you the flexibility to connect multiple of peripherals
4. Which Arduino board is best for Robotics?
- If your robotics project requires a large number of digital and analog connections, Arduino Mega is a good option for small to medium sized robots. In case your robot doesn’t require many ports, you can start off with Uno or Nano, depending on the board size constraints.
5. Which Arduino board is best for 3D Printer?
- Arduino Mega is the most preferred Arduino board for building a 3D printer, since it gives you sufficient number of ports to work with a greater number of 3D printer accessories
6. Which Arduino board is best for Quadcopter?
- Since space and weight is a huge factor when building quadcopters/drones, smaller versions of Arduino boards like the Nano or Pro mini are considered to be ideal.
7. Which Arduino board is best for Embedded Systems?
- As embedded systems devices are usually made to integrate into a larger platform, smaller boards of Arduino like Nano and Pro Mini would be ideal for this application. For beginners, Uno provides a great start.
8. Which Arduino board is best for Automation?
- Almost any Arduino can be used for automation. Your requirement will only change based on the required number of GPIO pins. Mega and Nano are the most common choice for Automation based projects.
9. Is Raspberry Pi easier than Arduino?
- Arduino is highly preferred for single purpose projects because of it being economical and easy to use. However, for multi-purpose applications, go for the Raspberry Pi because it has a better processor to handle complex computation.
- If your project is designed for real-world applications or real-time embedded systems, Raspberry Pi is recommended as it provides real-time monitoring and robust networking capabilities.
- The Arduino board is much simpler to use when compared to Raspberry Pi. With the knowledge on basic programming, Arduino board can easily be interfaced with analog sensors and other electronic components.
10. Where should I buy Arduino?
- You can get original Arduinos online from various authorized vendors online like Robocraze. Make sure you know how to differentiate between an original Arduino and clones compatible with Arduino, so that you’ll be able to immediately identify as soon as you receive the product.
11. What are the main components needed for Arduino projects?
Arduino projects require several key components to function properly. These components are essential for building and programming various electronic circuits and devices using Arduino microcontrollers. Whether you're a beginner or an experienced enthusiast, understanding the main components is crucial for successfully embarking on Arduino projects.
- Arduino Board: The heart of any Arduino project is the Arduino board itself. It serves as the main microcontroller that controls and interacts with other components. There are different types of Arduino boards available, such as Arduino Uno, Arduino Mega, Arduino Nano, and more, each with its own specifications and features.
- Breadboard: A breadboard is a crucial tool for prototyping Arduino projects. It allows you to create temporary circuits without the need for soldering. The breadboard provides a grid of interconnected holes, allowing you to easily connect and disconnect components.
- Jumper Wires: Jumper wires are used to establish electrical connections between the Arduino board and other components or the breadboard. They come in various lengths and colors, making it easy to identify and organize connections.
- Components for Input: Arduino projects often require input from external devices. Some commonly used components for input include:
- Pushbuttons: These are simple switches that can be pressed to send signals to the Arduino.
- Potentiometers: Also known as variable resistors, potentiometers allow you to adjust and control analog input values.
- Sensors: Various sensors, such as temperature sensors, light sensors, motion sensors, and more, can be used to gather data from the environment.
- Components for Output: Arduino projects also involve generating output signals to control external devices or display information. Some commonly used components for output include:
- LEDs: Light-emitting diodes (LEDs) are commonly used for visual indicators and displays.
- LCD Displays: Liquid crystal displays (LCDs) provide a way to present information in a text or graphical format.
- Servo Motors: Servo motors enable precise control of angular or linear motion, making them suitable for robotics and automation projects.
- Resistors: Resistors are crucial components used to limit or control the flow of current in a circuit. They are often used to protect components from excessive current and prevent damage.
- Capacitors: Capacitors store and release electrical energy, helping stabilize voltage levels and filter out noise in Arduino circuits.
- Other Components: Depending on the specific project requirements, additional components such as transistors, diodes, motors, relays, and more may be necessary. These components enable advanced functionalities and expand the possibilities of Arduino projects.
It's worth noting that the specific components required for an Arduino project will vary based on the desired functionality and complexity. Additionally, understanding basic electronics principles and having a reliable power supply are also important aspects of successful Arduino projects.
By familiarizing yourself with these main components and their functionalities, you'll be well-equipped to start creating your own Arduino projects and exploring the exciting world of electronics and programming.
12. Can Arduino be used for robotics and automation?
Arduino proves to be a remarkably versatile platform, perfectly suited for robotics and automation ventures. Its broad assortment of compatible components and user-friendly programming environment establish a robust foundation for constructing and overseeing robotic systems and automated devices.
Arduino's adeptness in interfacing with diverse sensors, motors, and actuators renders it an ideal selection for robotics applications. By integrating sensors such as ultrasonic range finders, infrared sensors, or gyroscopes, Arduino-based robots gain perception and responsiveness to their surroundings. These sensors bestow functionalities encompassing obstacle detection, line following, object tracking, and more.
Moreover, Arduino boards seamlessly interface with various motor types, including DC motors, servo motors, and stepper motors. This grants precise control over the movement of robot arms, wheels, grippers, and other mechanical components. By amalgamating motor control with sensor inputs, Arduino-powered robots autonomously execute complex tasks or operate under remote command.
Beyond robotics, Arduino holds widespread utility in automation projects. Whether it involves managing household appliances, monitoring environmental conditions, or overseeing industrial processes, Arduino's adaptability and expandability position it as an exceptional choice. Leveraging Arduino's digital and analog input/output pins, automation systems actively interact with the physical realm and deliver context-sensitive responses.
Additionally, Arduino's compatibility with an array of communication protocols, including Serial, I2C, SPI, and Ethernet, facilitates seamless integration with other devices and systems. This seamless integration facilitates remote control, data logging, and networked automation solutions.
In conclusion, Arduino's versatility, cost-effectiveness, and extensive community support establish it as an outstanding platform for robotics and automation endeavors. Whether you're an enthusiast or a professional, Arduino empowers you to materialize your ingenious concepts and construct intelligent, interactive, and automated systems.
13. Is programming knowledge required to use Arduino?
Programming knowledge can be advantageous when using Arduino, but it is not always an absolute prerequisite. Arduino's user-friendly environment and extensive documentation ensure accessibility for beginners and those without prior programming experience. Arduino employs a simplified programming language based on C/C++, which is relatively straightforward to grasp and acquire.
Through the Arduino IDE (Integrated Development Environment), users can compose code using a comprehensive set of predefined functions and libraries explicitly tailored for Arduino boards. These functions abstract numerous intricate programming concepts, enabling users to concentrate on their projects rather than getting entangled in intricate coding specifics.
For novices, Arduino provides an extensive array of example codes and tutorials encompassing a wide range of projects and functionalities. These resources furnish detailed step-by-step instructions, explanations, and readily available code snippets, empowering users to swiftly commence their projects and construct them without necessitating in-depth programming expertise.
Nevertheless, as projects grow in complexity and specific functionalities are demanded, a foundational understanding of programming concepts proves increasingly valuable. With programming knowledge, users can personalize and expand Arduino's capabilities, implement intricate algorithms, and leverage advanced features.
Fortunately, a multitude of online resources, forums, and communities exist to support Arduino users across all proficiency levels. These platforms proffer guidance, troubleshooting assistance, and code sharing, thereby simplifying the learning process and enabling individuals to refine their programming skills while collaborating with Arduino.
14. How can I connect sensors to Arduino boards?
Connecting sensors to Arduino boards is a straightforward process that requires a few basic steps. Here's a guide on how to connect sensors to Arduino boards:
Identify sensor pins
Start by identifying the pins on your sensor. Most sensors have multiple pins, including power (VCC), ground (GND), and signal (or data) pins.
Check sensor specifications
Refer to the datasheet or documentation of your sensor to determine its voltage requirements and communication protocol (analog or digital).
Prepare Arduino
Ensure that your Arduino board is powered off during the connection process. Identify the necessary pins on the Arduino board for connecting the sensor.
Power connection
Connect the VCC pin of the sensor to the 5V pin or the appropriate power pin on the Arduino, depending on the sensor's voltage requirement. Connect the GND pin of the sensor to one of the GND pins on the Arduino to complete the power connection.
Signal connection
For analog sensors, connect the signal pin of the sensor to one of the analog input pins (labeled A0, A1, A2, etc.) on the Arduino. If your sensor uses a digital communication protocol (such as I2C or SPI), consult the sensor's documentation to identify the specific Arduino pins required for data communication. Connect the corresponding data pins accordingly.
Additional components
Some sensors may require additional components, such as pull-up or pull-down resistors, capacitors, or level shifters. Refer to the sensor's documentation to identify if any additional components are necessary and connect them as instructed.
Upload code
Once the physical connections are made, you'll need to upload the appropriate code to your Arduino board. The code will depend on the specific sensor and the functionality you want to achieve. The sensor's documentation or online resources often provide example codes to get you started.
Test and monitor
After uploading the code, power on your Arduino board. Use the Arduino IDE's Serial Monitor or any other suitable method to monitor the sensor's output values and verify if they match the expected readings. This step is crucial to ensure that the sensor is properly connected and functioning as intended.
Remember
- Refer to the datasheet, documentation, or online resources specific to your sensor for accurate and detailed instructions on connecting and using the sensor with Arduino.
- By following these steps, you can easily connect sensors to Arduino boards and unlock a wide range of possibilities for your projects, including environmental monitoring, motion detection, distance sensing, and much more.
15. Can Arduino be integrated with other platforms or devices?
Yes, Arduino offers various possibilities for integration with other platforms or devices. Here are some instances:
- Arduino Cloud: The Arduino Cloud platform empowers you to conceive, implement, manage, and oversee your connected devices. You can leverage your phone as an IoT device within the Arduino Cloud and integrate ChatGPT with Arduino Cloud to fashion intelligent IoT devices capable of natural language interaction.
- Microcontrollers: You can establish a connection between a microcontroller and different sensors, transmitting sensor data to the Arduino board. The microcontroller functions as an interface linking the sensor to the Arduino board.
- Arduino Robot: The Arduino Robot stands as the inaugural official Arduino on wheels. Equipped with two processors, each on its respective board, this robot operates with the Motor Board governing the motors and the Control Board reading sensors and making operational decisions. Both boards serve as complete Arduino boards programmable through the Arduino IDE. The Arduino Robot serves as an excellent foundation for learning how to fabricate your own robots.
- Other platforms: Arduino seamlessly integrates with other platforms, including Raspberry Pi, to facilitate the realization of more intricate projects. For instance, an Arduino board can be employed to control sensors and actuators, while a Raspberry Pi processes the data and transmits it to the cloud.
Overall, Arduino facilitates the integration with other platforms or devices to foster the creation of elaborate and sophisticated projects. The choice of the specific integration method relies upon the project requisites and the devices or platforms involved.
16. What are the advantages of using Arduino for DIY projects?
There are numerous benefits associated with utilizing Arduino for DIY projects, including:
- Pre-assembled convenience: Arduino arrives in a comprehensive package, incorporating a 5V regulator, a microcontroller, and other components, rendering it user-friendly, especially for beginners.
- Cost-efficient: Arduino proves to be a budget-friendly platform for acquiring hands-on knowledge, with several inexpensive Arduino clones available as alternatives to the original.
- User-friendly: Arduino, as a microcontroller-based platform, facilitates swift prototyping. It has been designed to introduce students to the realm of programming and is readily accessible, even to beginners.
- Versatility: Arduino finds applications across a broad spectrum, from home automation and smart gardening systems to robot construction, IoT device creation, and even the development of wearable technology.
- Vast community: Arduino boasts a large community of users and developers who readily share their projects, ideas, and expertise online. This collaborative community serves as an excellent opportunity for learning from others and seeking assistance when required.
- Open-source nature: Arduino operates as an open-source platform, granting free access to hardware and software designs for anyone to utilize and modify. This fosters enhanced flexibility and customization of projects.
In conclusion, Arduino stands as a versatile, cost-effective, and user-friendly platform ideally suited for DIY projects. Its pre-assembled convenience, versatility, and extensive community contribute to its popularity among both novices and experienced makers.
Explore Other Categories :
Arduino Original board | Compatible Arduino Board | Arduino Shield | Arduino Case | Arduino USB Cable | How to use Buzzer with Arduino | Arduino Kit | Arduino uno price
Popular Searches:
M5Stack | Development Boards | DIY Kits | 3D Printers/Pens | IOT & Wireless | Sensors | Drones/UAV | Motors & Mechanical | Displays | Batteries & Power Supply | Tools & Instruments | Cables & Connectors | Prototyping & Misc | How to Use Buzzer with Arduino | MAX30100 Arduino | Arduino Interfacing with Ultrasonic Sensor | Motor Drivers | Heat Sink
- Choosing a selection results in a full page refresh.
- Opens in a new window.